November 5, 2017 by Skogsduva
 In September I finally finished a vintage cardigan that I started waaaay long back. I don’t even remember when I started it, but it must 4 or 5 years ago. It was fun to work on, but also very time-consuming, so I often put it away to work on something else. I’m quite proud that it’s finished and that it looks well! The pattern is called Blackberry Cardigan and comes from the wonderful book A Stitch In Time Volume 1 by Susan Crawford. (I recently bought Volume 2 as well, but didn’t like the patterns in that one as much.)
It is a short cardigan that is perfect for wear with vintage-inspired dresses, such as this King Louie dress. I was very happy to find buttons in exactly the same shade at a vintage market. I thought that sewing it together would be a pain, but I actually liked it. It was fun to see how the seams were neatly coming together. I found this video very helpful for setting in the sleeves (even though this cardigan has the purl side out). For sewing the sleeves and side seams, I used the proved method of picking up two of the bars in between the first and second column of stitches.


Posted in Crafts, Knitting | Tagged a stitch in time, blackberry, cardigan, knitting, vintage | Leave a Comment »
November 29, 2014 by Skogsduva
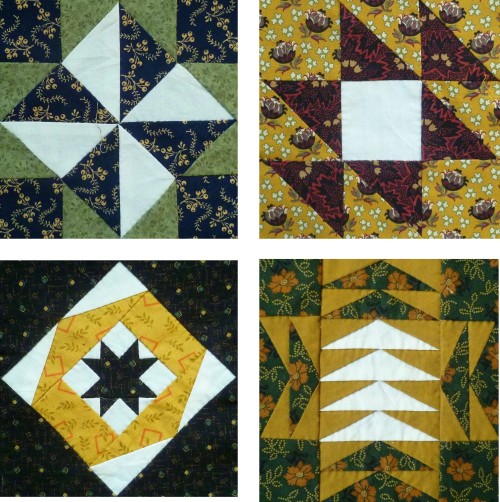
Years ago I received a book for my birthday: the Civial War Diary Quilt by Rosemary Youngs. Rosemary Youngs collected entries from ten diaries that were written by women during the American civil war. She designed a quilt block to go with each diary entry, and when you make them all, you have a quilt with 121 different blocks.

It is interesting to read the stories about people’s lives during the civial war. Also the patchwork is interesting because each block is different. I use reproduction fabrics and make most blocks on foundation paper. Here are pictures of the first eight blocks (unfortunately the colors don’t show very well):

Posted in Crafts, Quilting | Tagged civial war diary quilt, foundation paper, patchwork, reproduction | 2 Comments »
October 3, 2014 by Skogsduva

In Sapporo there is a great craft store called Kanariya. If you ever happen to be in Sapporo you must visit, it is just GREAT. Four floors full of fabrics, quilt supplies, knitting wool, sewing notions, felt, beads, books, buttons, zippers, etc, etc. And there were lots of kits, for example for making your own rabbit-basket (a basket in the form of a rabbit, that is, or any other animal), the cutest needle-felt animals, bags and purses like these:
 I just love the Japanese style for quilting and sewing. There is so much eye for detail, and I like the muted colours. There was a large division with Japanese fabrics and I bought a whole bunch of fat quarters. They were quite cheap compared to the prices in Europe.
Before we went to Sapporo, we stayed in a super nice pension in Hakodate. The owners were so kind, and the house was really cosy with hand-made pillows and other things. When we left, the hostess gave me a wonderful bag and a handmade purse as a gift. I was so delighted, but I also thought I had to give something back. So I used the fabrics I bought in Sapporo to make them a set of 6 coasters for their breakfast table:

The back is a piece of black felt, attached with festoon stitch. I finished them in a few days and send them by post to Hakodate. One day later I received an email, with a picture showing the coasters on their table:
 Sato (the hostess) put a cat on the table that a friend of hers made of kimono fabrics, so cute. The pension is called Jokura, by the way, and it is highly recommended for anyone appreciating a clean and cosy pension serving delicious Japanese breakfast.
I’m now making another set, because I like them myself as well :-)


Posted in Crafts, Sewing, Travel | Tagged coasters, craft store, fabric, Japan, Japanese, Kanariya, Sapporo, sewing, sewn | 2 Comments »
September 7, 2014 by Skogsduva
In August, my husband and I have been on holiday in Japan. While enjoying the nature, cities and culture of Hokkaido (Japan’s northernmost large island), I picked up some craft ideas.
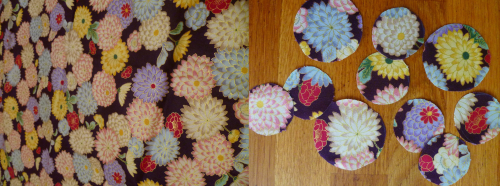
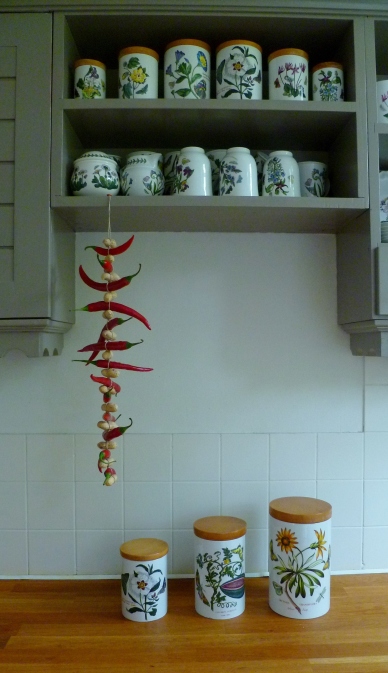
In a pension I saw dried lotus seed cones filled with small balls of fabric. I really liked the idea and took two seed cones home with me, as well as some fabric with flowers. This is the result of my work:
At first the cones looked like this:
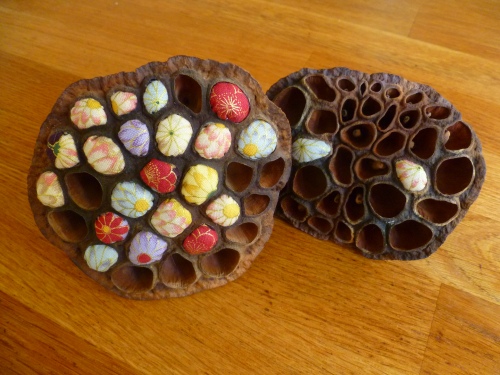
To make the fabric balls simply cut a lot of fabric circles, stuff them with cotton wool, tie them and put them into the holes in the lotus seed cones.
Nice decoration, isn´t it?


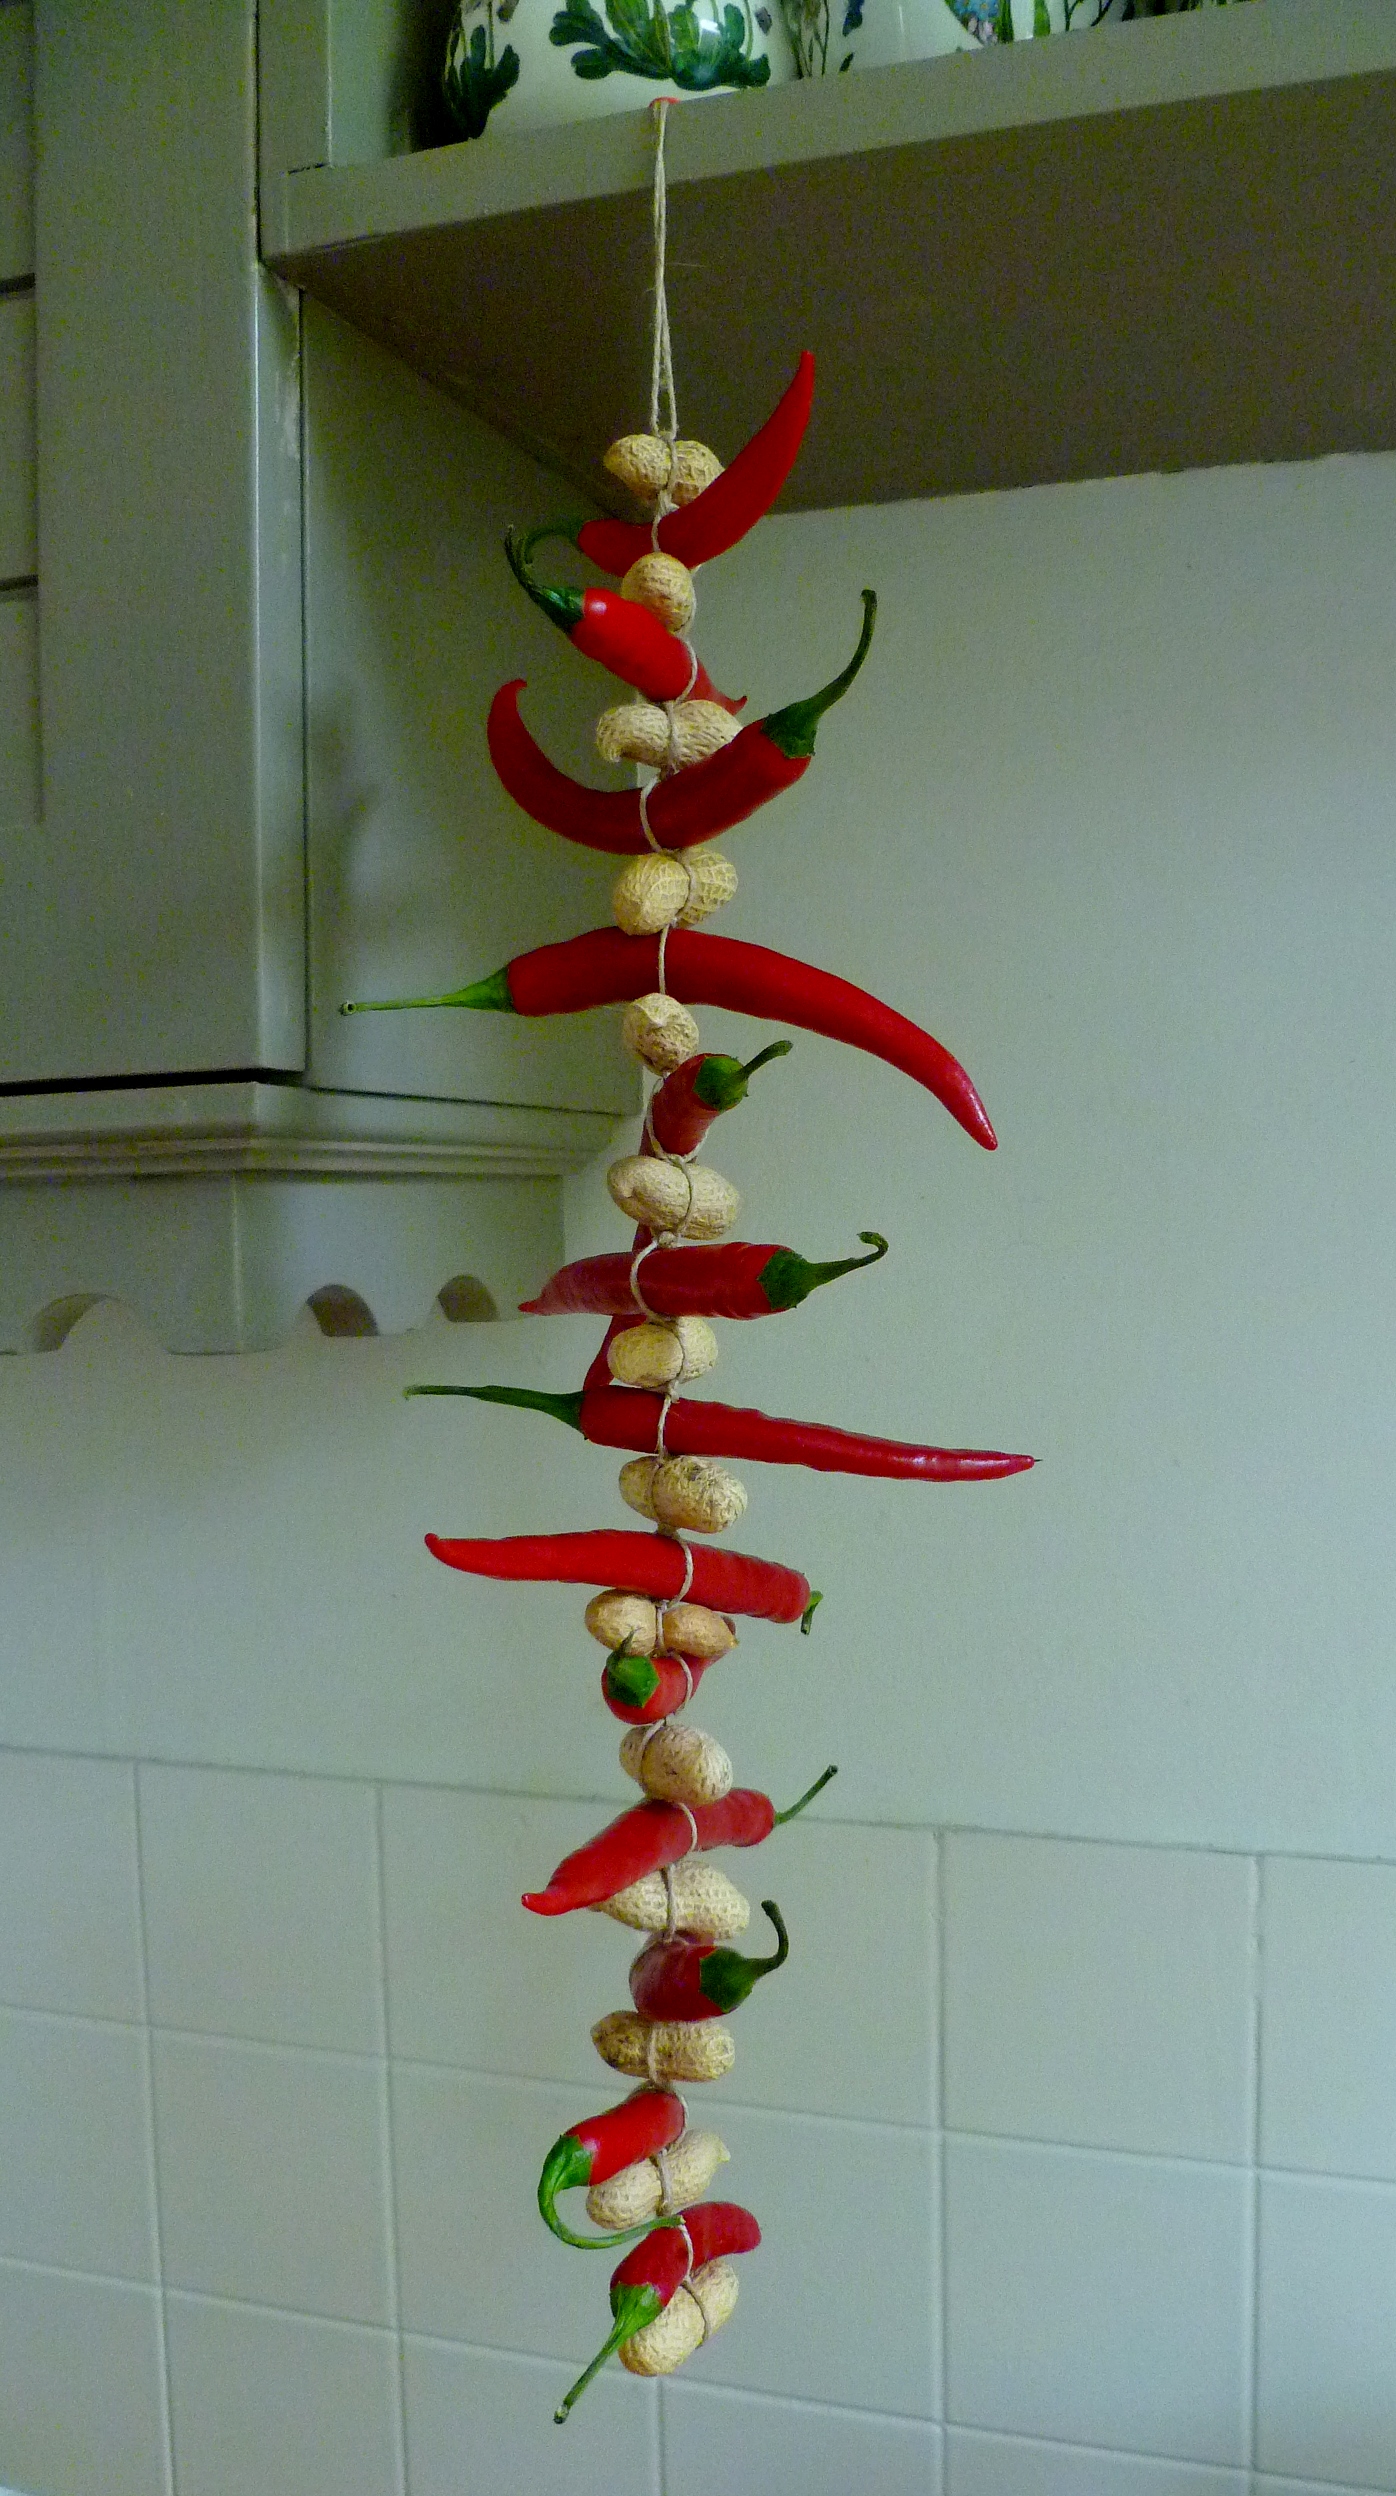
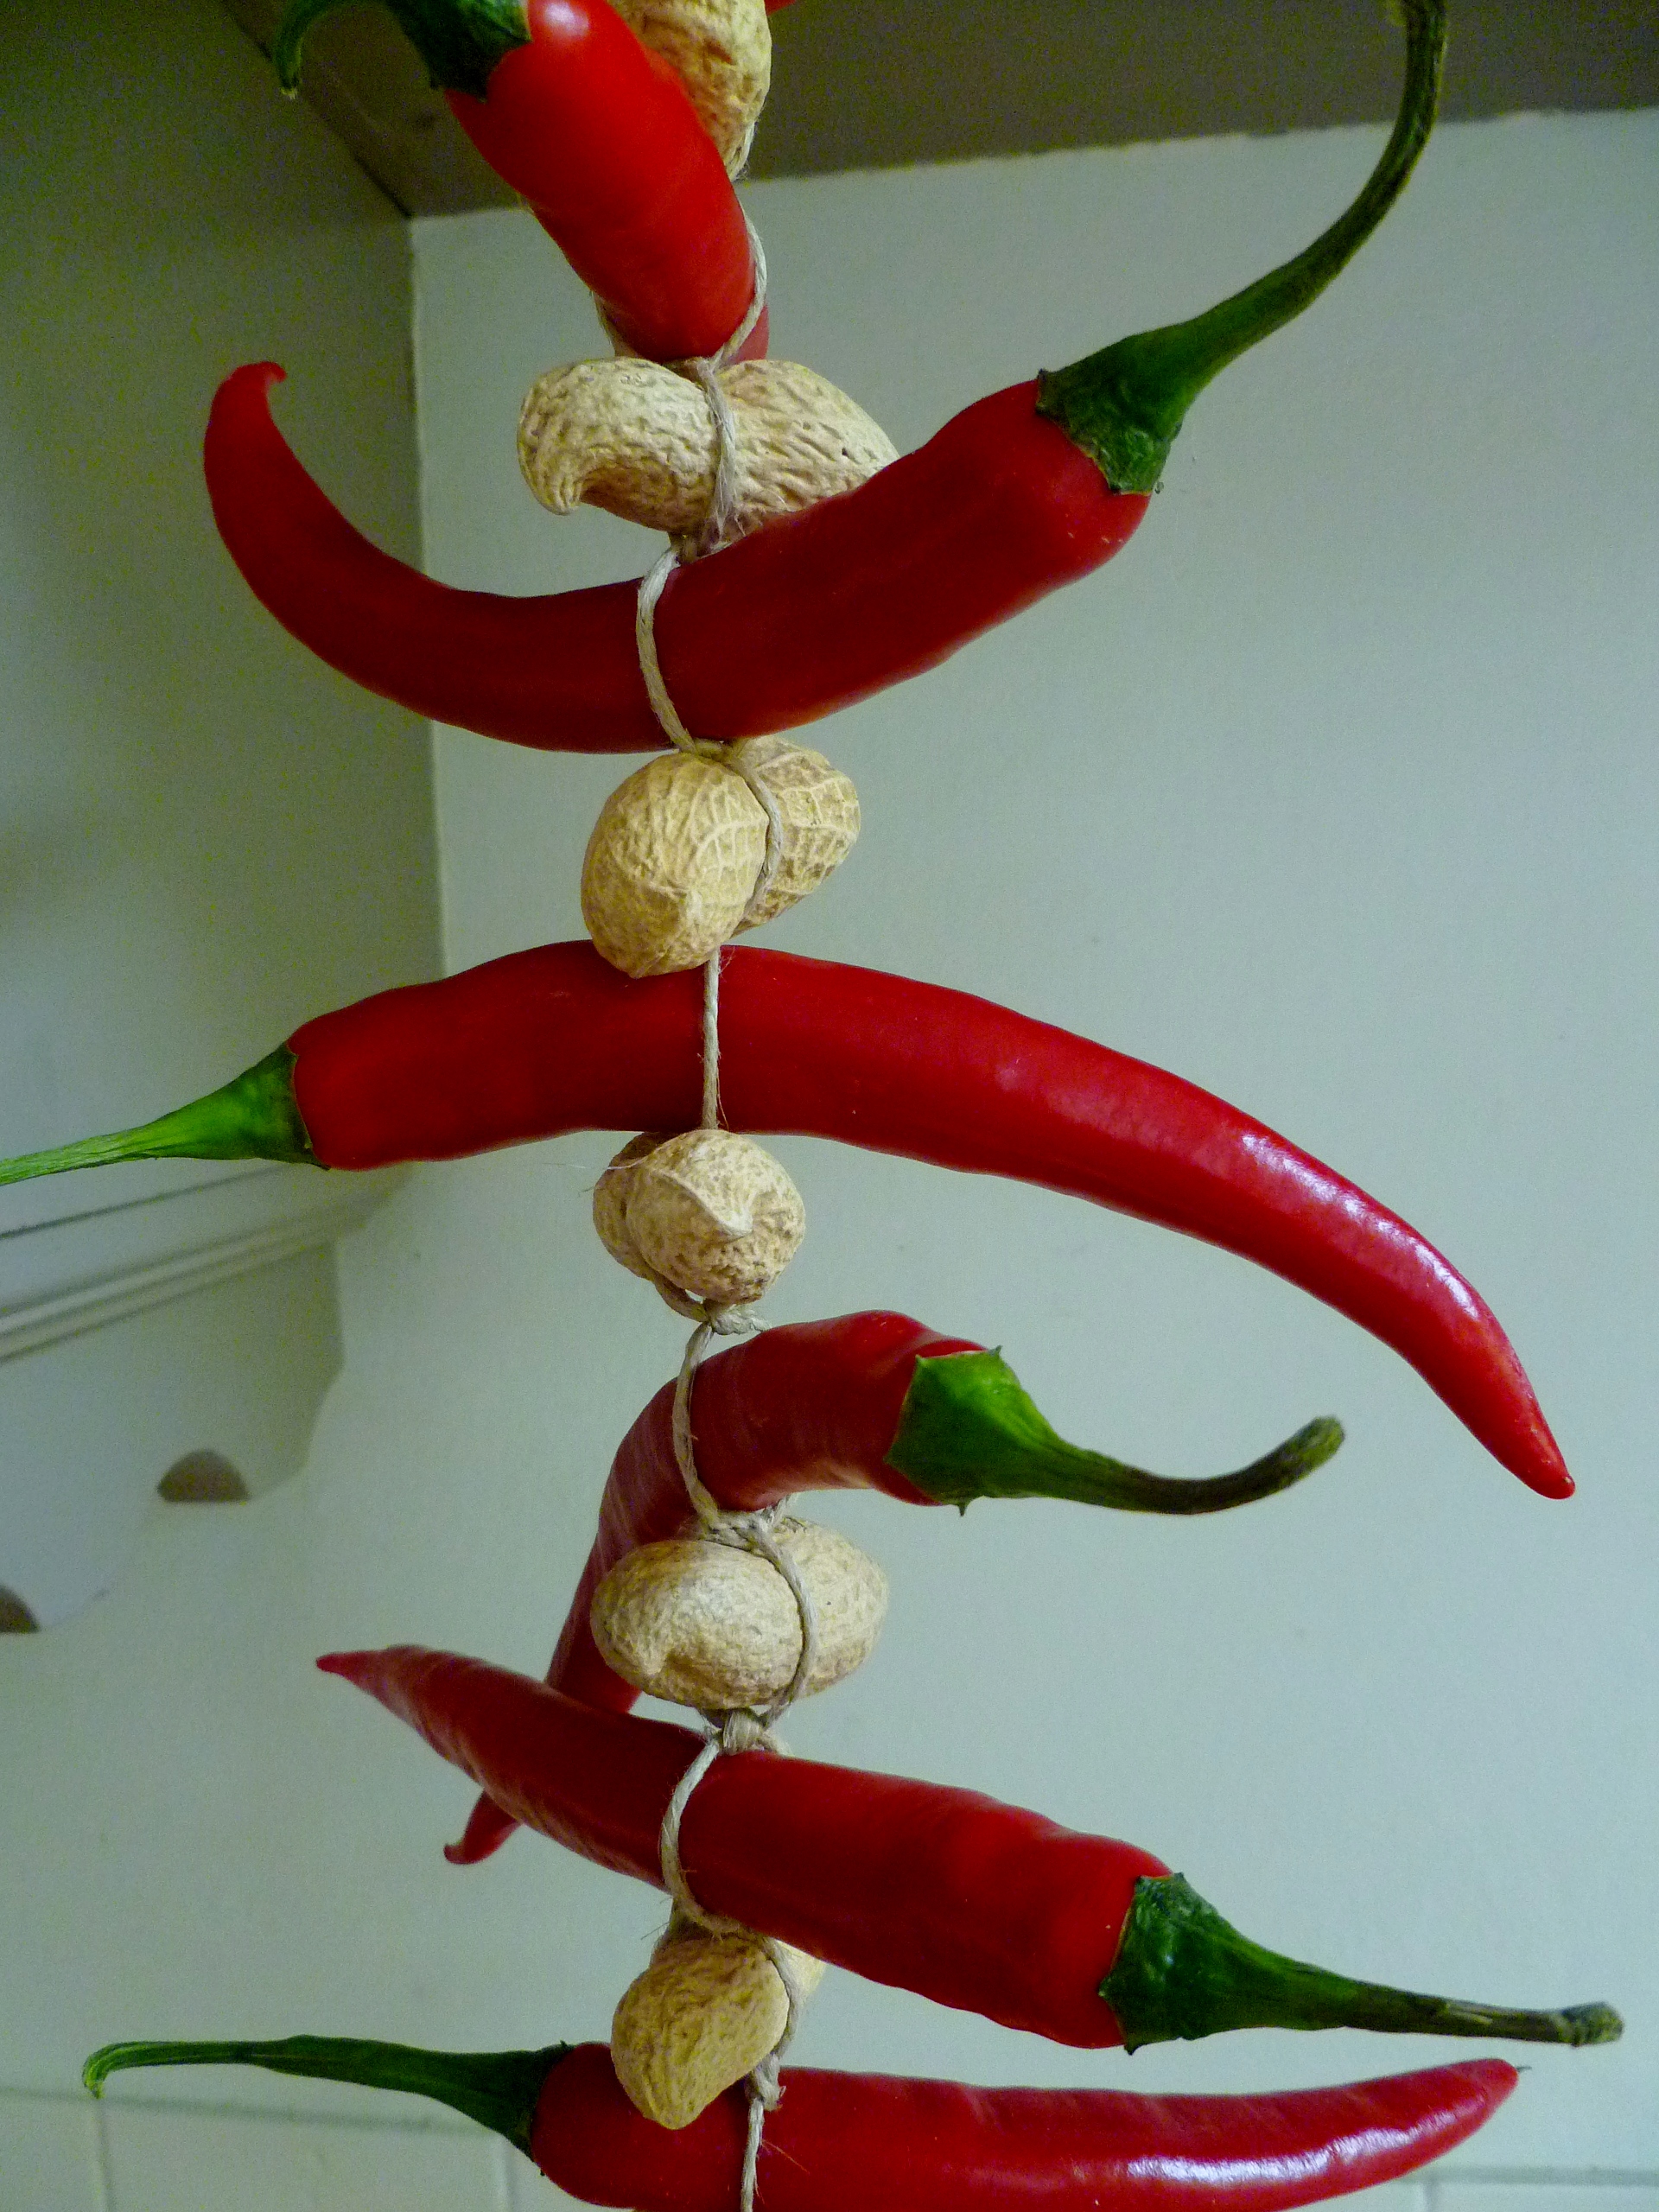
In a Japanese magazine I saw a garland for the kitchen, made of red peppers and peanuts tied together. I tried to make one yesterday, but it doesn’t exactly look like the one in the magazine because I could only find peppers that were a bit too large. I also did something wrong with the tying, because in the original all peanuts and peppers were neatly lined up while in my garland they stick out in all directions. But I still like the idea. :-)


Posted in Crafts, Sewing, Travel | Tagged garland, Japan, Japanese, lotus, lotus seed cone, ornament, peanut, pepper | 3 Comments »
May 30, 2014 by Skogsduva
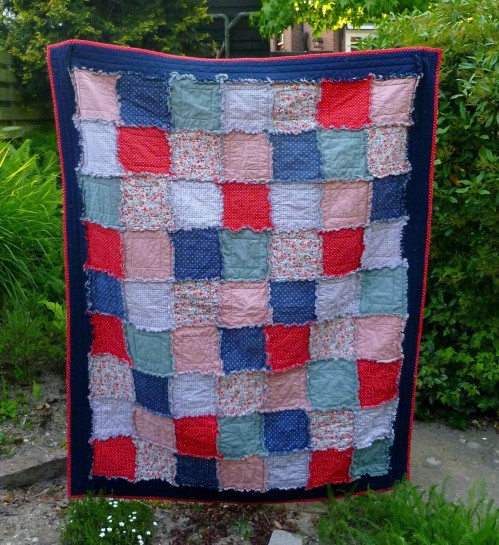 Over the past two weeks, I’ve made a rag quilt together with some colleagues. It was a gift for another colleague, who is going through a difficult time right now. She really loved it. On the picture above is the front of the quilt, the side with the ragged edges. On the picture below is the back side, where all people of our group wrote their names on the 32 plain blue-grey squares.

It was such fun to work on this quilt! I had never made a rag quilt before and wanted to try it for ages. We followed the directions of this tutorial. Only, instead of sewing a cross over each square, we sewed a smaller square so that the names on the back would not be sewn over. And instead of having a frilled edge, I added a border with regular binding.
 First we cut a bunch of 8 inch/20 cm squares of the plain blue-grey fabric and let all our colleagues write their names on them. Some people even added beads or a little embroidery. We also cut squares out of six patterned fabrics. Flannels are perfect for this type of quilt, but we couldn’t find nice ones so we used regular cotton. During two sewing evenings we assembled the quilt, and this weekend I added the border and binding.

 I washed this quilt at 40 C, but that didn’t really do anything for the frills. Perhaps a higher temperature would have been better, but the fabric markers were only washable up till 40 C. So I called a friend who has a dryer, and that made things a little better. The frills are still not as fluffy and curled up as they can be, but I guess they will get better over time.
Posted in Crafts, Quilting | Tagged name quilt, rag quilt | Leave a Comment »

Last week I finished a small wall quilt. The pattern is called Tillie, designed by Jeanneke. She has made a lot of very cute doll quilts.

It only measures 42 x 42 cm. Despite the small pieces I really liked to work on this quilt.

Hanging on the wall in our living room:

Posted in Crafts, Quilting | Tagged blue, brown, butterfly, doll quilt, mini, pink, quilt, small, tillie, wall | Leave a Comment »
March 29, 2014 by Skogsduva
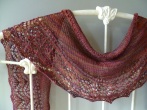
 Today I took a walk into the forest to make some pictures of my newest FO, a shawl. Since spring is very early this year and the shawl has such bright colours, I named it Spring stripes.
It’s made using Schoppel-wolle yarn. The lime green wool is sock yarn named Admiral 4-ply (colourway Oliven) and the other yarn is Crazy zauberball (colourway Frische fische). The pattern is called Nymphalidae and free to download via Ravelry. Here’s also a link to this project on my Ravely page. For some tips and tricks on how to block this shawl, check this blogpost by the designer Melinda VerMeer.


The next pic shows the back side of the shawl, which is actually also quite nice:
 It is a present for my aunt, who will receive it for her birthday in May. I hope she’ll like it!


Posted in Crafts, Knitting | Tagged free pattern, knit, knitting, lace, nymphalidea, shawl, spring, stripes | 2 Comments »
March 5, 2014 by Skogsduva
I finally finished a quilt that I started working on years ago. It now hangs in our living room and I really like how it turned out! 
The middle part is a printed panel, the border is patchwork. I quilted around all figures on the panel, and then filled the empty spaces with 1 x 1 cm diamonds. You can read more about this traditional quilt here.


Posted in Crafts, Quilting | Tagged diamonds, palempore, panel, patchwork, quilt, quilting | Leave a Comment »
February 9, 2014 by Skogsduva
In December I participated in a swap organised by the Ravelry group Ew-la-la. I received a very nice package from the US, that included 2 skeins of Malabrigo rios yarn. I had heard about Malabrigo before, how nice and soft it is, and I can only agree. The colourway is called Volcano:

Since the colour is very bright, I thought it would be prettiest to use a lace pattern to break it a little. I found a perfect pattern: the February Fitted Pullover by Amy Herzog (pattern for free here). It was a real pleasure to knit. The only thing that went ‘wrong’ is that the body before the waist decreases turned out too short. I should have added quite some length, but didn’t notice. But if I just pretend it was meant to be like this, and layer it with a longer T-shirt, it actually looks all right, don’t you think?


Posted in Crafts, Knitting | Tagged february, fitted, knitting, lace, malabrigo, pullover, rios, volcano | 3 Comments »
November 22, 2013 by Skogsduva
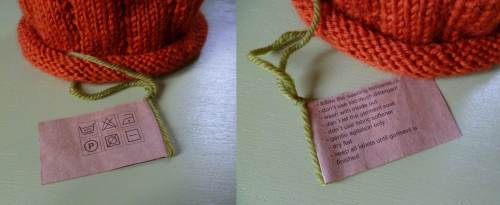
I’ve been knitting a lot over the past weeks. My first finished objects were two pumpkin hats (Garnstudio drops pattern). The plan was to make one for a friend’s baby, but the first hat turned out so large that it fitted me. Never mind, I like to wear a pumpkin hat myself as well! Then I made a second hat in the right size for the baby.

This one is the baby’s hat.
I cut the washng instructions from the yarn label and attached it to the hat so that the parents would know how to treat it.
The one below is my own hat. I wore it a couple of times and got the impression that people were watching it in the street!


The second finished object I can show is a lace shawl. The pattern is called Arroyo and can be found for free here. I really liked it as a first-attempt lace shawl, because the lace chart is not too complicated, the shawl is relatively small, and the lace itself is only a strip.
As mentioned before, I used Rowan fine art for this, a sock yarn. I made two small mods to the pattern by knitting the plain part in stockinette instead of garter stitch, and repeating pattern rows 32-35 along the upper edge of the shawl. I think I will give it to my sister in law for Christmas.


Posted in Crafts, Knitting | Tagged arroyo, drops, garnstudio, hat, lace, pumpkin, rowan, shawl | 2 Comments »
October 21, 2013 by Skogsduva
Just a short post to share some great patterns for last-minute Halloween crafting! There’s a nice selection of knitting and crocheting patterns on Yarnspirations:

On the Garnstudio website there are a few cute things also:
 I love the pumpkin hat!
On the other side of the cute-scary spectrum: a shrunken head in a jar…

For small quilts, wall hangings and table runners there’s plenty of inspiration and free patterns collected on the Quilt Inspiration website:
 Enjoy!
Posted in Crafts, Crochet, Knitting, Quilting | Tagged free, halloween, knitting, patterns, quilting | Leave a Comment »
October 21, 2013 by Skogsduva
Recently my husband and I went on a short holiday to an island in the North Sea. It was really beautiful there.


The common sea buckthorn shrubs were heavy with fruits. They are used for fruit drinks but also for lotions and hand creams.

On the beach we found a small lobster. It was a bit dried out, but when I put it back in the sea it came back to life and ran off.

There were some very nice forest fragments as well with beautiful ferns (I love ferns!).
Of course I did a lot of crafting while on holiday. I worked a bit on my Tillie quilt top but also started a new knitting project: a lace shawl using Rowan fine art, a fine sock yarn. I probably never used such expensive yarn before (18 euro for 100 gram), but then it’s a hand dyed blend of merino wool, kid mohair, mulberry silk and polyamide. The colourway I have is called Waxwing.

Posted in Crafts, Knitting, Nature | Tagged island, knitting, north sea, rowan fine art, waxwing | Leave a Comment »
October 8, 2013 by Skogsduva
A few weeks ago, I saw on Ravelry that a knitting magazine would come out with patterns inspired by my favorite book series ever: Harry Potter! Then came the disillusionment: it would only be available in the US. But luckily, many Americans  on Ravelry were willing to send copies to other parts of the world.
I myself got into contact with someone from Canada whose husband picked up a few copies in the US. She send me one (with a lovely Canadian bookmark attached to it), in exchange for some yarn from my country. It was such a treat when it came in the mail!

There are many nice patterns inside. I like for example the two cloaks, the mermaids shawl and of course Ginny’s cardigan.


.
.
.
.
.
.
.
.
.
.
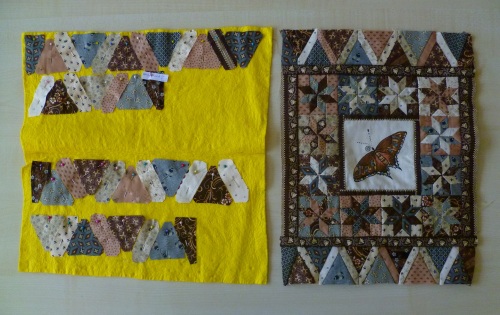
But before I start any new knitting project I’d like to have my Tillie quilt top finished. It’s nearly there: only two triangle borders left to piece and attach (I’m using this yellow dishcloth to pin the pieces in order). I like how it’s turning out:
Posted in Crafts, Knitting, Quilting | Tagged harry potter, interweave, knitting, patterns | 4 Comments »
September 25, 2013 by Skogsduva
For my birthday, I received four fat quarters from a member of our quilting bee, two blue, one white and one brown.
Another bee member gave me a very cute pattern for a doll quilt, called Tillie (designed by Jeanneke). The original looks like this:

I decided to enjoy both presents at once, and started working on this pattern using the fabrics I received, supplemented with some more blue, white and brown fabrics. I also added some pink to make it look a bit softer. So far I have nearly finished the centre part:

With these colours it looks quite different from the original, which has a more traditional feel to it. The pattern is really nice to work on, the pieces are very small but that also means it comes together quickly. And it’s only a few repetitions, so it doesn’t get boring. The star blocks measure about 5 cm (2 inches) across.
I was happy to find a centre panel in exactly the right colours at Den Haan & Wagenmakers in Amsterdam.

Currently I’m lying on the couch with a bad cold, the upside of which is that I don’t have anything on my mind but petting the cat, drinking hot water and do some stitching (besides coughing and blowing my nose about 300 times per day). So I hope to get this finished soon!
Posted in Crafts, Quilting | Tagged blue, brown, butterfly, patchwork, pink, quilt, star blocks, stars, tillie, white | 2 Comments »
June 25, 2013 by Skogsduva
Just finished another band on my inkle loom. This one was also ordered by a re-enactor; I’ve sold three bands now and earned the same amount the loom cost me.


It resembles much the first band I ever wove, but this one has an extra stripe of dark brown along the edge. When I look at the pictures of my first band I’ve definitely improved my weaving! My goodness, the edges of that first one are so wonky.
This is the exact pattern I used (made here). It has 33 warp threads and is 23 mm wide.


Posted in Crafts, Re-enactment, Weaving | Tagged band, inkle, loom, pattern, weaving | Leave a Comment »
June 25, 2013 by Skogsduva
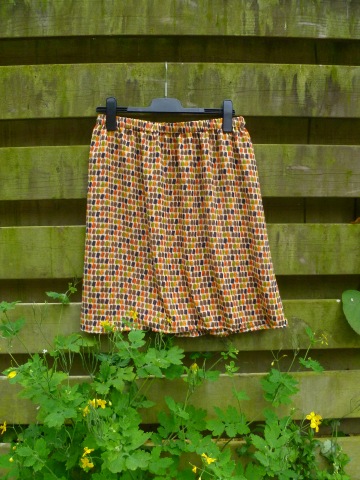
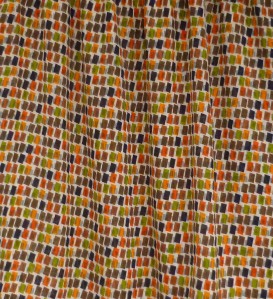
The author of one of my favorite blogs came up with a very simple & very nice pattern to make a summer skirt. There even was a tutorial, so decided to give it a try. Thanks for making and sharing this tutorial Kessa!
Posted in Crafts, Sewing | Tagged easy, flowy, pattern, sewing, simple, skirt, tutorial | Leave a Comment »
June 3, 2013 by Skogsduva
 Inspired by the fantastic blog Backstrap weaving, I continued weaving bands, this time trying my hand at a simple but nice technique that allows for a bit more complicated patterning: warp floats. There is a good tutorial on the abovementioned website. My first try was much appreciated by some of my fellow Viking age re-enactors and two people even ordered a band. I haven’t had a hobby before that pays for itself actually, so that was nice.

On the backside you see the colour of the weft coming through, which gives a funny effect as well. Perhaps I will try to do more with this another time, it’s an easy way of bringing in an extra colour:


The trouble with this technique is that the threads are pulled in a bit more than with plain weave, so that the band becomes narrower. Hence you need more warp threads so achieve the same width, and that wasn’t really working out on the small ‘loom’ I had. That’s when I decided to buy myself a proper inkle loom. It came by mail this weekend, and I’m so happy with it!

Setting up the warp was SO much easier and it’s also very nice to not be tied to your weaving. I also found it less tiring for my arms and shoulders. On the picture above you see the shortest possible warp: 1.3 m giving a band of a little more than 1 m. The longest possible warp is 3.4 m, a little shorter than what I would have wished for, but I couldn’t find a larger loom available in my country. This one is an Ashford, they have a smaller model available also.

Posted in Crafts, Re-enactment, Weaving | Tagged ashford, band, floating warp, inkle, loom, pick-up, tutorial, weaving | 2 Comments »
March 20, 2013 by Skogsduva
After writing in a previous post about my Viking age coat/kaftan, I was asked which pattern I used. Well, I used a very basic Viking age dress pattern and simply cut open the front panel to create a coat. I made a graph and some instructions for those who are interested. Although I did my best, I can’t guarantee that all is correct as I’m not an experienced pattern maker, so please use your common sense while using this pattern.

ab = your length from shoulder to ankle (or whatever length you like the coat to have)
cd = circumference at breast height devided by 2, plus a little extra to avoid tightness
ef = distance from ankle to waist
gh = 30 to 40 cm
ij = length of your stretched arm from shoulder joint to wrist
kl = 10 to 12 cm
mn = ± 40 cm
Always add seam allowances to the measurements above! Also when cutting out for example the neck-hole, remember that it will become larger when you sew the hem.
Textile finds from Birka show that the tunic-type garments from 9th and 10th century Sweden did not have separate front and back panels with shoulder seams, but were cut as one large piece with a hole for the head opening. For the wider fabrics that we have today this is likely an inefficient use of fabric, therefore I assume here that you have separate front and back panels.
Cut front and back panels as rectangles of size ab x cd; you will make the front opening and the split for the back gore later. Similarly, cut the sleeves as rectangles of ij x mn, you will shape them later. Cut the neck-hole out of the front and back panels. At the back it should be 3 to 4 cm deep (after sewing the brim), at the front it doesn’t matter because you will enlarge it later on.
Start the assembly by sewing the body halves together at the shoulders. Sew the four side-gores to either side of the front and back panels. Sew the two gore halves of the back gore together. Cut the opening along the back to insert the gore, but be careful not to make the slit too large, it should be a little shorter than the distance e-f because of the seam allowances. Sew the sleeves to the body, centered on the shoulder seam. The square gussets, that serve to relieve tightness in the armhole, are sewn into the corner of the sleeves and the front panel, as shown in the graph.
Finally, fold the whole thing in half and sew each side from wrist to armpit to hem. Shape the sleeves while doing this, but do not make them too tight, your balled fist should still be able to fit through. While sewing the armpit area, the square gusset is folded into a triangle, attaching the point indicated by a * in the graph to the other armpit, also indicated by a *. When you are finished, you have a dress. Now, make a coat out of it by cutting open the front panel along the centre, making the upper part into a V-shape so that the front opening lines up with the sides of the neck-hole. Fold over the fabric to the inside and secure with small stitches that are not visible on the outside. Do the same with the sleeve ends and underside of the garment.
 Shaping the sleeve
To finish, press all seams open with your fingers and sew the seam allowances flat with a stitch that is invisible on the outside. Finishing the seams like this is especially important in places where multiple seams come together, such as at the top of the gores, and it will improve the drape of the final coat. For thinner fabrics such as linnen I prefer not to press the seams open, but to fold both seam allowances to one side for more strength. Mostly I trim one of the allowances to 1/4 inch or 1 cm and the other allowance to 1/2 inch or 2 cm, then press them to the side of the shorter one and fold the longer allowance around the shorter one.
You can decorate your coat by adding some nice embroidery or -which was probably more common- by attaching woven band or metal-brocaded braids. In Viking times it was also very common to accentuate the seams with decorative stitches. For more information on decorations as well as general information on Viking clothing and coats, visit this nice website.
Posted in Crafts, Re-enactment, Sewing | Tagged coat, kaftan, pattern, re-enactment, viking | 37 Comments »
March 2, 2013 by Skogsduva
Tonight we will be visiting a collegue of mine who is expecting a baby soon. I made her a baby blanket out of a charm pack Flirt by Sandy Gervais (actually I used half of the charm pack and will use the other half to make a blanket for another collegue who is expecting).
 I like the colours of this fabric series, not ‘too baby’, but still nice for a baby blanket. As you can see I took it easy, no sashings, no real quilting, just plain squares with a border. I also did not use any batting but a fleece backing.

It was all done by machine, except the embroidery within every other square and along the edge.

I had never tried mitered corners before, but now I really love it, it looks so much neater! With this tutorial it was easy peasy.


Posted in Crafts, Quilting, Sewing | Tagged baby, blanket, flirt, mitered corners, moda, sandy gervais | Leave a Comment »
February 25, 2013 by Skogsduva
In the last post I talked about a band I was weaving to decorate my Viking age coat or kaftan. Here are some pictures of the finished coat.

The coat was made of wool in a very dark shade of grey, almost black, which contrasts nicely with the colourful band. I also like how the colours of the band match the glass and amber beads. Fashion at that time was to have strands of beads hanging from the two brooches that fasten the straps of the apron dress (the green one) at the chest/shoulder (brooches are not visible on the pictures).

Last weekend there was a re-enactment event at a castle where I wore my new coat, and it served its purpose of keeping me comfortably warm. The only thing I still need are a pair of clasps to fasten the coat at the front.
Posted in Crafts, Re-enactment, Sewing, Weaving | Tagged band, coat, kaftan, re-enactment, viking, woven | 16 Comments »
February 10, 2013 by Skogsduva
 Today I finished weaving a 6 m long band. Nice and colourful, isn’t it? I will use it for decorating a re-enactment Viking coat. Two of the three colours I dyed myself with plant material: red with madder roots and yellow with onion skins. I really enjoyed the dying process, it is so much fun to see beautiful colours appearing from simple plant material.
I especially liked dying with onion skins, they are easy to collect during daily cooking and give wonderful colours. This golden yellow was obtained by heating the wool in water with 100% of the wool’s weight in onion skins, dyed for only 30 minutes at maximum 90°C (the wool was first mordanted with 15% alum). After that I felt sorry to throw away the onion skin ‘soup’ that still had so much colour, so I threw in a second skein of wool. This one was not pre-treated with alum, and I heated it for about two hours (at max. 90°C) and let it cool in the dye pot until the next day. It turned out more orange-brownish compared to the first one.

Onion skins – madder roots – onion skins:

I am planning to buy an inkle  loom, but for now I simply weave by tying one end of the warp threads to a fixed point and the other end to my belt, with the heddle in between. I do look forward to buying an inkle loom though, as it is hard to keep the tension right, especially of the outermost warp threads.
For this specific band, I needed warp threads of 7.5 m long. I cut them, wound each on a paper roll, and hang them on a stick, so that I could slowly pull and make a braid. This braid was untied bit by bit as I wove.

The weaving pattern was designed with help of the pattern generator that I’ve linked to before. These graphs show the order of the warp threads and the final pattern:


I hope to show pictures of the end result soon, when the band is sewed onto my coat.
Posted in Crafts, Re-enactment, Weaving | Tagged band, dyeing, inkle, loom, madder, onion, pattern, weaving, wool, woven | 10 Comments »
January 8, 2013 by Skogsduva
Last moth I saw a picture of a kusudama on a blog that I follow. A kusudama is a flower ball made of folded paper, and the art of making it goes back to ancient Japanese culture.
I liked this flower ball it so much I immediately gave it a try myself, with the help of a very comprehensive video tutorial. My first kusudama was made of simple coloured note paper:
 (these are not three kusudama’s, but three pictures of a single one)
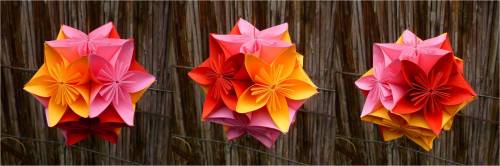
After making the first, I couldn’t stop. So I bought some nicely coloured origami paper:

This paper is called Corona Harmony, manufactured by Grimmhobby. Each sheet was 15 x 15 cm but I cut them into four pieces of 7.5 x 7.5 cm each. The colouring of this paper is perfectly suitable for folding flowers: inside and outside had different colours, with the shades gradually changing towards the heart of the flower.

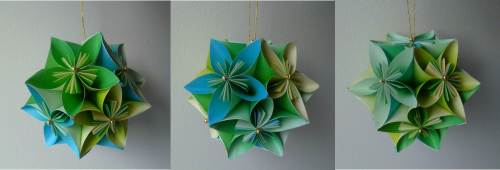
I made two kusudama’s out of this paper, a pink and a green one. In the middle of each flower I glued a small golden bead, which really adds the finishing touch (click to enlarge the pictures).

For some reason it is quite addictive to fold kusudama’s! I´m now working on two more of each. They would make a nice gift for someone who appreciates crafty stuff.

Some notes if you’d like to make these kusudama’s yourself. You need 2 packages of Grimmhobby Corona Harmony origimi paper to make one pink and one green kusudama, or 3 packages to make two of each. In one package there are 10 pink sheets (in two different shades), 10 green sheets (in two different shades) and 5 dark blue sheets (which I haven’t used). You need 60 small squares to make one flower, so that means 15 sheets of this paper, each cut into 4 squares. For instructions how to make a kusudama I would recommend the above-mentioned video tutorial.

Posted in Crafts | Tagged flower ball, folding, grimmhobby, harmony, kusudama, origami, paper | 2 Comments »
December 24, 2012 by Skogsduva
A few weeks ago, we changed our bedroom and I’d like to show some pics!
This is what it looked like before:

(Apart from the not-so-well made bed, ahum) it was a very pale room, with white curtains, white bed, white carpet. And this is how it looks now:

On the floor we laid cork, and two fluffy sheep carpets from IKEA.


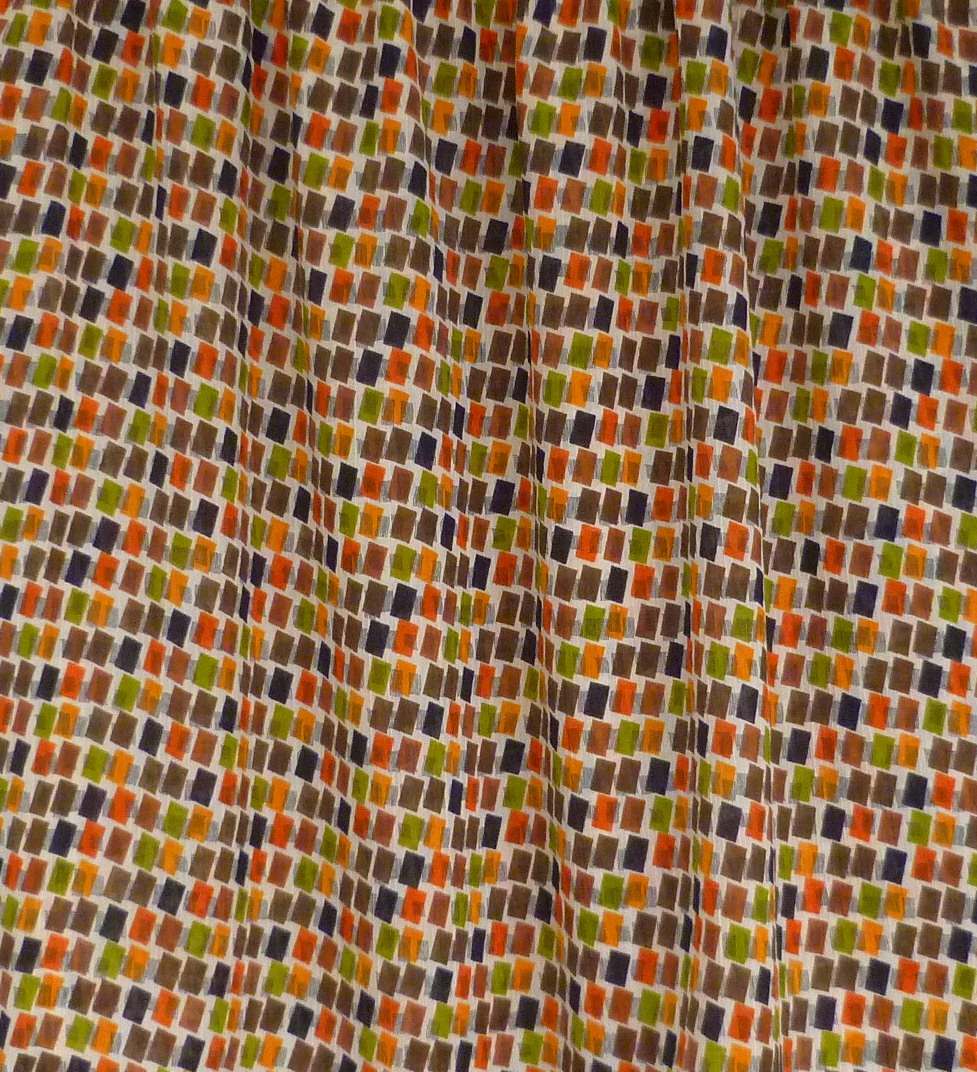
I sewed new curtains out of a beautiful red woven fabric (with light-blocking fabric sewed against them at the backside). The same fabric was placed in the two heart-shaped frames on the wall.
When we moved into this house three years ago, we removed a small bush from the garden en used some of its wood to make curtain rods. I think they look better now with this country style fabric.
The wooden book shelves and night tables were treated with a red stain (again from IKEA) and I love how they turned out.
The only thing left to make now is a nice bed quilt!

Posted in Home, Sewing | Tagged bedroom, cork, curtains, floor, makeover | Leave a Comment »
October 30, 2012 by Skogsduva
A few weeks ago I ordered some of the cutest Halloween fabrics:
 They were designed by Teresa Kogut, except for the orange one at the bottom right, which is by Debbie Mumm.
I’m using the fabrics for two quilt projects. The first is a quick & easy lap quilt, simply joining 15 x 15 cm bloks with black sashings. Is it currently being sandwiched:

The second project is my first attempt at appliqué. It is going to be a small wall hanging, depicting a house on a hill surrounded by pumpkins and plants. I’m using the lighter ‘ghost fabric’ for the background:

The round shapes of the pumpkins are a bit challenging, but I hope to be able to adjust some of the wonkyness by adding a bit of embroidery here and there later…
By the way, Teresa Kogut has designed some very nice needlepunch patterns, especially for Halloween and Christmas, check them out here. I really have to try that some time…
Posted in Crafts, Quilting | Tagged appliqué, debbie mumm, ghosts, halloween, lap, quilt, teresa kogut | Leave a Comment »
Older Posts »